Creating tiled background patterns

We’ve covered before how to use the wallpaper package to create a background for your documents using, amongst others, tiled images in a previous post. But at times I really want to create patterns from existing LaTeX font ornaments or TikZ drawings, rather than using an extra image file.

The tcolorbox package has a fill tile picture option that can be used with arbitrary TikZ code:

tcolorbox-fill-tile-picture

But from experience, repeatedly running TikZ code can result in long compilation times, especially if you were planning to use design a tile pattern as the background to all pages. Saving a TikZ tile drawing as a LaTeX box, and then repeating that, would compile much faster.

So, OK, let’s give this a try and design some tiles! *crackles knuckles*

Designing a Tile

I’m no designer, so I thought I would just fumble along and try to mock up something first, before cropping/clipping things down to the required tile element. The adforn package provides some subtle ornaments, so I’ll use those as a start to play around on a grid to help me lay things out:

\usepackage{adforn}
 
\begin{document}
\definecolor{blossompink}{HTML}{FFD7D7}
\definecolor{fruitgold}{HTML}{FFEEBE}
\definecolor{stictchbrown}{HTML}{E7D192}
 
\begin{tikzpicture}[x=1cm,y=1cm,domain=0:3]
\draw[step=1cm,black!10,very thin] (0cm,0cm) grid (3cm,3cm);
\foreach \x in {0,1} {
  \foreach \y in {0,1} {
     \node[font=\Huge,text=blossompink] at (2*\x, 2*\y) {\adforn{5}};
     \node[font=\Huge,text=fruitgold] at (2*\x+1, 2*\y+1) {\adforn{35}};
   }
}
\begin{scope}[dashed,stictchbrown]
  \draw plot (\x,\x-1);
  \draw plot (\x,\x+1);
  \draw plot (\x,-\x+1);
  \draw plot (\x,-\x+3);
\end{scope}
\end{tikzpicture}

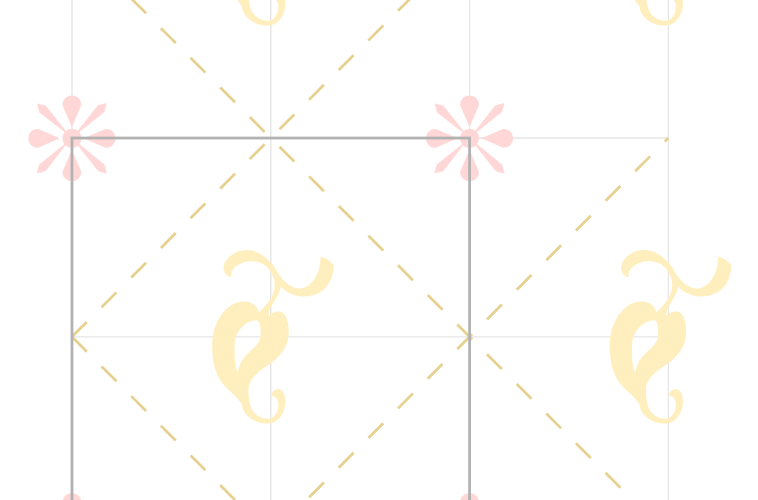
scratch-design-1 That looks pretty good to me! And I only need a 4-by-4 unit of this sketch (the dark gray square) to make me a tile, which I can get with a \clip (0,0) rectangle (2,2); at the start of the TikZ code.

This can then go into a \savebox for later use:

\newsavebox{\tileone}
\sbox{\tileone}{%
  \begin{tikzpicture}[x=1cm,y=1cm]
  \clip (0,0) rectangle (2,2);
  \foreach \x in {0,1} {
    \foreach \y in {0,1} {
       \node[font=\Huge,text=blossompink] 
         at (2*\x, 2*\y) {\adforn{5}};
       \node[font=\Huge,text=fruitgold] 
         at (2*\x+1, 2*\y+1) {\adforn{35}};
     }
  }
  \begin{scope}[dashed,stictchbrown]
    \draw plot (\x,\x-1);
    \draw plot (\x,\x+1);
    \draw plot (\x,-\x+1);
    \draw plot (\x,-\x+3);
  \end{scope}
  \end{tikzpicture}%
}

If you \usebox{tileone}, you’ll see this:
tile-1

And we can now use this with tcolorbox‘s fill tile picture option:

\begin{tikzpicture}
\path[draw,fill tile picture={%
  \node[inner sep=0pt,outer sep=0pt,fill=blue!40!black]
       {\scalebox{0.5}{\usebox{\tileone}}};
}] 
(2.75,-0.75) -- (3,0) -- (2.75,0.75)
\foreach \w in {45,90,...,315}
{ -- (\w:1.5cm) } -- cycle;
\end{tikzpicture}

This can also be easily made into a whole-page background. I usually (ab)use the page header to get it in:

\usepackage{fancyhdr}
\usepackage{tikzpagenodes}
\fancyhf{}
\renewcommand{\headrule}{}
\fancyhead[L]{%
\begin{tikzpicture}[overlay,remember picture]
  \path[fill tile picture={%
    \node[inner sep=0pt,outer sep=0pt] {\usebox{\tileone}};
  }] (current page.south east) rectangle (current page.north west);
  \fill[opacity=0.4,white] ([shift={(-1em,1em)}]
        current page text area.north west) rectangle
           ([shift={(1em,-1em)}]current page text area.south east);
\end{tikzpicture}
}
\begin{document}
\thispagestyle{fancy}

pagebg-tileone-fs8pagebg-tilethree-fs8

The extra thumbnails shows designs that uses pgfornament-han and pgfornament just for fun; might be a bit over the top there though. Enjoy designing your new backgrounds, but do take care not to be over-flamboyant to the point of being too distractive, and repeating things too many times on too many pages will still take a long time to compile, despite already using \usebox!
Quick Diagrams with SmartDiagrams

It all started with a question on TeX.SX: Namely, is there any quick way to draw diagrams from a list of items, similar to the ‘Smart Art’ feature in PowerPoint 2010?

It wasn’t long before the package smartdiagram was born as a response, using TikZ to do the actual drawings. The basic syntax is:

\usepackage{smartdiagram}
\smartdiagram[diagram type]{list of comma-separated items}

Here are some examples (based on material from here):

\smartdiagram[circular diagram]{Assess,Plan,Implement,Renew}

\smartdiagram[flow diagram]{Assess,Plan,Implement,Renew}
\smartdiagram[buggle diagram]{Planning Cycle,Assess,Plan,Implement,Renew}

If you happen to be preparing a Beamer presentation, replacing the \smartdiagram command with \smartdiagramanimated will result in an automatically ‘animated’ diagram, with each item in the list appearing one at a time as you advance through the slides:

See the manual for other digram types and customisation options (colours, shapes, sizes, etc).

Using Relative Units in TikZ Drawings

I used to happily create TikZ drawings with pt units, let’s say in a paper using the IEEE style:

\documentclass{IEEEtran}
\usepackage{tikz}
\usetikzlibrary{positioning}
 
\begin{document}
\begin{tikzpicture}
\node[text width=60pt] (mor){Morphological Analysis};
\node[text width=35pt,right=12pt of mor] (syn) {Syntactic Analysis};
\draw[-latex] (mor) -- (syn);
\end{tikzpicture}
\end{document}

The output looks good enough, although I did have to try several times getting the text widths right:

But often times I’d want to reuse my TikZ code in other documents, e.g. a Beamer presentation, or my thesis in which I must use Times 11pt. But when I happily copied over my Tikz snippet over, I get:

\documentclass{beamer}
...
\begin{tikzpicture}
...
\end{tikzpicture}
...
\documentclass[11pt]{memoir}
\usepackage{mathptmx}
...
\begin{tikzpicture}
...
\end{tikzpicture}
...

Ouch, it looks like I need to figure out the different text width values in pts by trial and error, for each document I want to include my picture in!

Or do I?

The real issue here is that pt is an absolute unit (1pt = 1/72 inch), so my TikZ node’s text width stays the same while the font metrics is different in each document. Using relative units, like em or ex, would make my life a lot easier.

Let me explain: 1em is the height of the current typeface in the current size, and is a little bit wider than a capital ‘M’. This means the length/width 1em depends on the active font family and size.

And as a rough estimate, a capital ‘M’ is twice as long as a lowercase letter. ‘Morphological’ has 1 ‘M’ and 12 lower case letters, but 3 of these are ‘thin’ letters (‘l’ and ‘i’), so I’d go with 6em rather then 7. Similarly, I’d try 4em for ‘Syntactic Analysis’.

Let’s see the results, using the same TikZ code in all three versions (IEEE paper, beamer and typical thesis):

\documentclass{IEEEtran}
\usepackage{tikz}
\usetikzlibrary{positioning}
 
\begin{document}
\begin{tikzpicture}
\tikzset{every node/.style={draw,align=center}}
\node[text width=6em] (mor){Morphological Analysis};
\node[text width=4em,right=1em of mor] (syn) {Syntactic Analysis};
\draw[-latex] (mor) -- (syn);
\end{tikzpicture}
\end{frame}
\end{document}
\documentclass{beamer}
...
\begin{tikzpicture}
...
\end{tikzpicture}
...
\documentclass[11pt]{memoir}
\usepackage{mathptmx}
...
\begin{tikzpicture}
...
\end{tikzpicture}
...

There! The text widths would vary relative to the current font families and sizes in use, so I won’t have to fiddle around with pt values for every new document I want to incorporate my existing TikZ code.

Drawing diagram; the cryptic way

Well, this is not-so-latex stuffs, but I just want to share with you guys…

I managed to tried out 3 applications:

Let’s see for Tikz;

%modified from texample.net
\documentclass{article}
\usepackage{tikz}
\usetikzlibrary{mindmap,trees}
\usepackage{verbatim}

\begin{document}
\pagestyle{empty}

\begin{tikzpicture}
\path[mindmap,concept color=red!50!black,text=white]
node[concept] {Hidup}
[clockwise from=0]
child[concept color=green!60!blue]
{
node[concept] {Pertimbangan}
[clockwise from=90]
child { node[concept] {cari duit} }
child { node[concept] {buat amal ibadat} }
child { node[concept] {belajar sungguh-sungguh} }
child { node[concept] {bina keluarga bahagia} }
}
child[concept color=orange] {
node[concept] {research}
[clockwise from=-30]
child { node[concept] {jurnal} }
child { node[concept] {artikel} }
};
\end{tikzpicture}\end{document}

will produce

then how about ditaa;

Raw source snapshot:


will produce:


and finally graphviz;

Source, the “dot” file:

digraph process{
node [color=blue,fontcolor=black,font=helvetica,]
nodesep=1.5
A[label=”Machine Object (MO)”]
B[label=”Portable Object (PO)”]

C[label=”developer”]
D[label=”translator”]
E[label=”tools”]
F[label=”POedit”]
G[label=”kbabel”]

C->B[label=”prepares PO”,style=dashed]
C->A[label=”compiles MO”,style=dashed]
C->B->D [label=”send PO files/i18n”,fontcolor=red]
D->B->C[label=”return translated files/l10n”,fontcolor=green ]
D->E[label=”translate using”,fontcolor=blue,style=dashed]
E->F
E->G
}

returns;